Yet Another Backup System - Part 1
10 Nov 2018Introduction ## {: #yet-another-introduction }
I’ve been wanting to get back into blogging, or at least writing more consistently, and I’ve also been looking for projects to work on. One of my favorite things to do, oddly enough, is to work on systems that will manage large amounts of data. So, I’ve decided to start a new project.
This is the first in a series of posts detailing the creation of a multi-tiered backup system for me, some of my friends, and potentially (but not likely) others as well. I will warn people ahead of time that I’m not building any hardware that could be called “resilient,” instead I’m using things that I already have around the house, plus a few extra cheap purchases, and a lot of software to make things work.
Speaking of software, almost everything used will be cross-platform and open source. I will likely be writing a lot of “glue,” in the form of shell scripts or potentially even some ruby. I will also be trying to focus on keeping things secure on untrusted servers, and secure in transit, to sometimes ridiculous levels. That being said, this is NOT a zero-knowledge system. Since it is for me, family, and friends, they are made aware of this ahead of time. In time, it is possible that this setup will grow and evolve to make a zero-knowledge system that functions similarly to this initial design idea, but that’s far down the line.
None of these blog posts will likely be as refined as my Icinga2 tutorials. One of the things I am trying to do is just get myself into the habit of documenting my projects. If I keep having to revise, edit, and source, I’ll eventually give up. So if there is anything you are interested in learning more about, Google will likely be your best friend.
Essentially, these are meant to explain how I built the system, and why I did what I did. Sometimes that may be as simple as “because I like them more” and other times it may have to do with more in depth research.
Environment
The server will exist in an environment with a battery backup system provided for the server, any data drives, and the core router that the server will be connected to. Connection to the internet is provided with a 100mbps symmetrical fiber connection that can be upgraded instantly to 1Gbps symmetrical if needed. Connections between the server and the fiber node is provided via CAT-7A cabling. Routing is handled by a Ubiquiti EdgeRouter Lite, with 3gbps line rate and one million packet per second routing. IPv6 and IPv4 are supported.
Eventually the router will be able to provide routes both to the public internet and to the dn42 darknet and Tor services.
Hardware
The hardware isn’t exactly great, but it is the best that can be done at this
time. The server consists of a Mac Mini Model 2,1 made circa early 2007. It
contains a dual core Intel Core2 Duo processor running at 2.0 GHz.
/proc/cpuinfo is provided here:
processor       : 0
vendor_id       : GenuineIntel
cpu family      : 6
model           : 15
model name      : Intel(R) Core(TM)2 CPU         T7200  @ 2.00GHz
stepping        : 6
microcode       : 0xd1
cpu MHz         : 2000.000
cache size      : 4096 KB
physical id     : 0
siblings        : 2
core id         : 0
cpu cores       : 2
apicid          : 0
initial apicid  : 0
fpu             : yes
fpu_exception   : yes
cpuid level     : 10
wp              : yes
flags           : fpu vme de pse tsc msr pae mce cx8 apic sep mtrr pge mca cmov pat pse36 clflush dts acpi mmx fxsr sse sse2 ss ht tm pbe syscall nx lm constant_tsc arch_perfmon
pebs bts rep_good nopl cpuid aperfmperf pni dtes64 monitor ds_cpl vmx est tm2 ssse3 cx16 xtpr pdcm lahf_lm pti tpr_shadow dtherm
bugs            : cpu_meltdown spectre_v1 spectre_v2 spec_store_bypass l1tf
bogomips        : 3999.68
clflush size    : 64
cache_alignment : 64
address sizes   : 36 bits physical, 48 bits virtual
power management:

processor       : 1
vendor_id       : GenuineIntel
cpu family      : 6
model           : 15
model name      : Intel(R) Core(TM)2 CPU         T7200  @ 2.00GHz
stepping        : 6
microcode       : 0xd1
cpu MHz         : 1000.000
cache size      : 4096 KB
physical id     : 0
siblings        : 2
core id         : 1
cpu cores       : 2
apicid          : 1
initial apicid  : 1
fpu             : yes
fpu_exception   : yes
cpuid level     : 10
wp              : yes
flags           : fpu vme de pse tsc msr pae mce cx8 apic sep mtrr pge mca cmov pat pse36 clflush dts acpi mmx fxsr sse sse2 ss ht tm pbe syscall nx lm constant_tsc arch_perfmon
pebs bts rep_good nopl cpuid aperfmperf pni dtes64 monitor ds_cpl vmx est tm2 ssse3 cx16 xtpr pdcm lahf_lm pti tpr_shadow dtherm
bugs            : cpu_meltdown spectre_v1 spectre_v2 spec_store_bypass l1tf
bogomips        : 3999.68
clflush size    : 64
cache_alignment : 64
address sizes   : 36 bits physical, 48 bits virtual
power management:
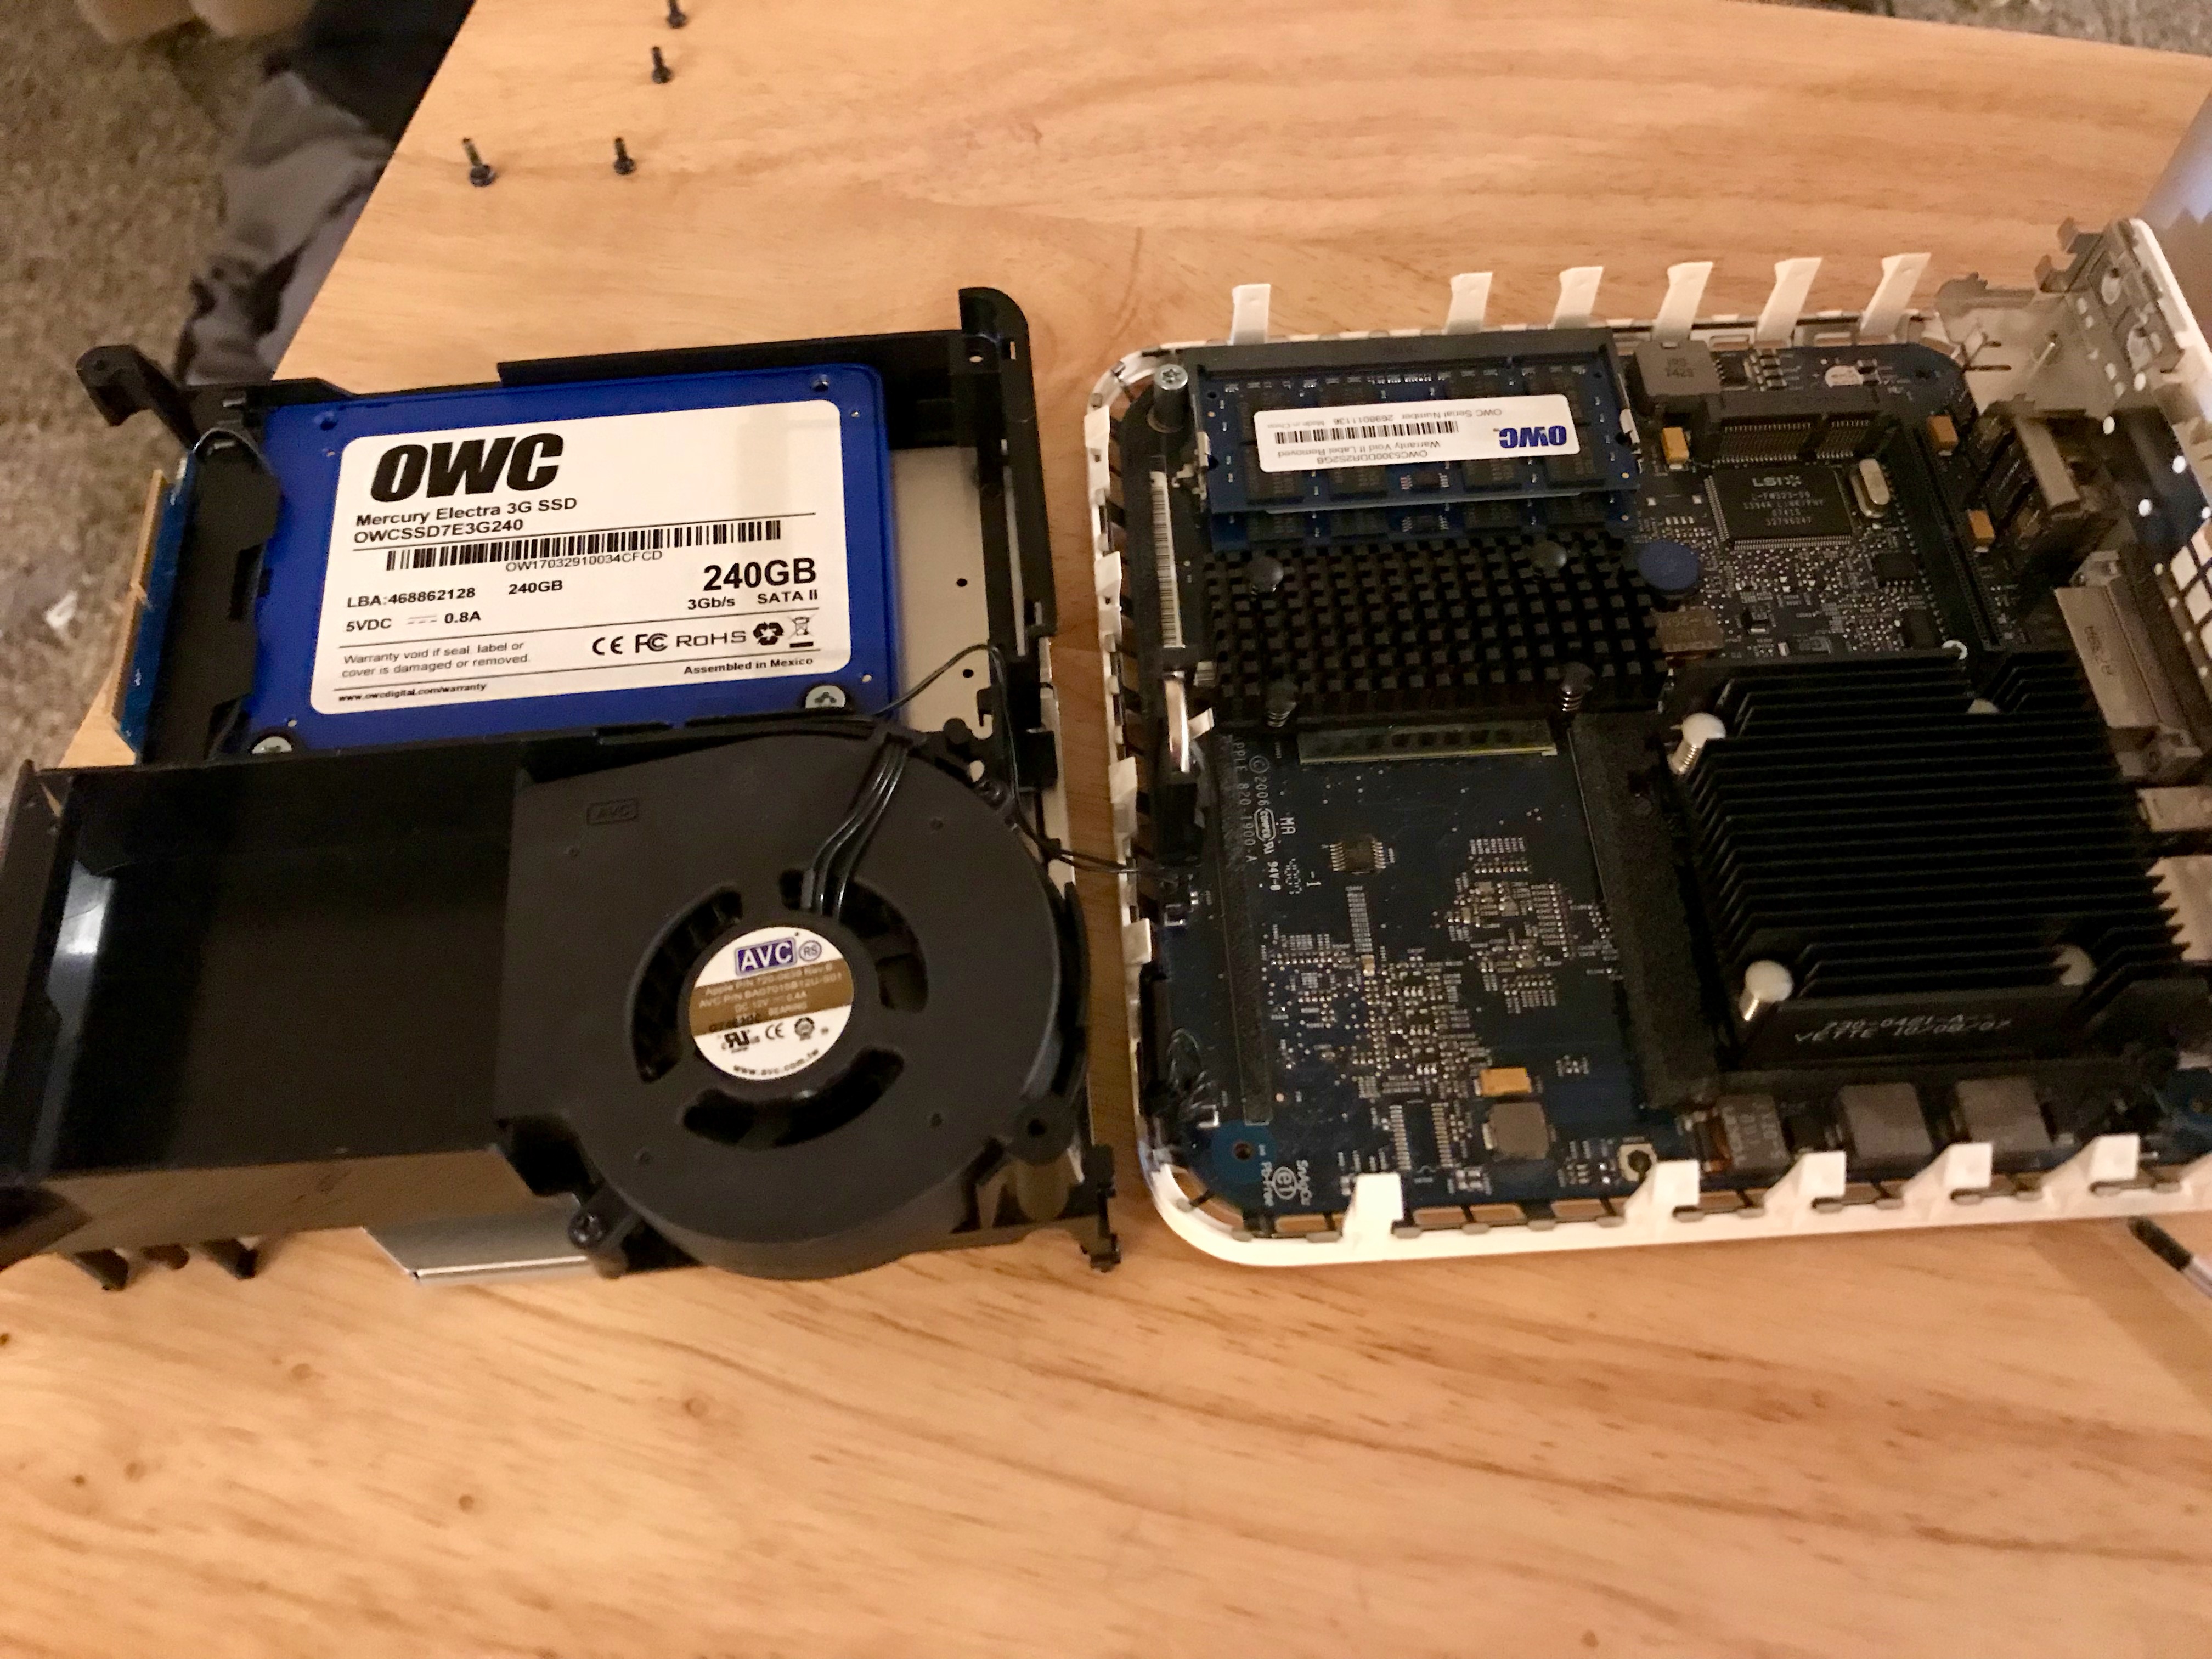
The server has been modified substansially from it’s factory state. The sound card has been removed, as has the WiFi card and Bluetooth card. IR functionality has been disconnected. Any extraneous wires have been removed. The original 160GB Hitachi hard drive has been replaced with a 240GB solid state drive from OWC. The ram has been maxed out with 4GBs, again provided from OWC. The system is not capable of addressing all 4GB despite being a 64-bit system due to limitations imposed in the EFI. The CMOS battery was replaced, and the processor was unseated, cleaned, and thermal material replaced. The fan was also replaced to head off any potential issues caused by old age. You can see a picture of the internals of the system below.
The system is connected to the router with a Fluke-Certified CAT-7A S/FTP dual shielded cable. The interface it is connected to supports a 1Gbps full-duplex connection.
The primary data disk is a G-Disk USB-C 4TB external drive. This drive utilizes a white label Western Digital Red WD40EFRX. It is connected to the Mac Mini via an Anker PowerLine+ USB-C to USB-A nylon cable.
The older Mac Mini’s would refuse to boot if the system could not detect that a monitor was connected to the system. Apple claims that this is because the Mac Mini was intended to be a true personal computer, which would generally prohibit the system’s operation without a display device. Strangely, no such detection is present to test for either a keyboard or a mouse.
To bypass this issue, a DVI Dummy Plug is installed in the Mini’s DVI port. This plug uses EDID to tell the system that a 1920x1200 capable display is connected. This has also been reported to be useful in accelerating VNC Remote Administration, however no GUI is present on the system.
Operating System
The operating system used on the server is OpenSUSE Leap 15 x64. You may remember that I mentioned above that the EFI used on the system is 32-bits. This limitation is bypassed by formatting the internal server drive to utilize a legacy MBR partition table. From this, GRUB2 loads in legacy mode, which is 32-bits. This provides the shim that allows the 32-bit system firmware to load a 64-bit operating system. Over 72 hours of stress testing revealed no instability with the operating system booted via this method.
OpenSUSE was installed using the Server profile. Originally the Transactional-Server profile was used, however the early morning reboots could cause issues, and the installation did not seem to play well with LVM.
Hardware Stress Testing
The internal solid state drive was tested via an OpenSUSE Live distribution. The
computer was first suspended and resumed to bypass the system’s EFI’s proclivity
for freezing the internal drive’s security interface. Once the interface was
unlocked, smartctl was used to trigger the drives internal SMART short test,
conveyance test, and extended test, in that order. All results were nominal.
The internal drive was then wiped via hdparm by sending an ATA Enhanced Secure
Erase Command with a non-null password.
A quick installation of OpenSUSE Leap 15 was then performed.
The hardware was then tested from inside the new installation utilizing the Stress-NG test suite for over 24 hours. During this time, four virtual memory test workers iterated over 100% of the available memory to force swapping as well as check for ram errors. Two CPU test workers were ran on the aggressive settings, and an IO worker was deployed to check the SSD interface. All systems passed the stress test perfectly, with benchmarks appropriate for a system from 2007.
The external drive was then connected to the system. A battery of tests were
performed. First, the drive was tested via smartctl. As the drive is connected
via USB, the -d sat,16 option was passed to allow communication directly with
the USB-SATA bridge. The drive was tested out of the box using the SMART short
self test, conveyance test, and extended self test. This first round of testing
took 10 hours to execute. After the inital round of tests, the SMART attributes
table and its corresponding values was recorded.
Then the badblocks command was ran to write to and read from every sector on
the drive. The full command was
badblocks -wsv -t random -b 4096 -c 4096 -p 4 -o /root/sdb.log /dev/sdb. This
performed four read-write-verify passes. Each pass took approximately 50 hours
to complete.
Once the badblocks battery was complete, smartctl was once again used to
run the same testing sequence of short, conveyance, and extended self tests. The
attribute table was once again dumped, it’s values recorded, and the values then
compared to those from the table dumped prior to running badblocks.
As these tests are actually still in progress, the results are not yet definitive.
Conclusion ## {: #yet-another-conclusion }
This first post simply outlines the primary variables in this project. Hardware, operating system, and environment should all be assumed to remain static for the remaining project entries. Should anything change, I will likely update this entry versus notating it in the respective entry where the change was made. It will be made clear that this entry has been edited, should that come to pass.
Extensive testing was performed to detect any chance of infant-mortality in the hardware. I have previously had negative experiences utilizing hardware right out of the box.